June 02, 2013

Heeeeeeeeeeeeeeeeeeeeeeere's Shelli!


Man oh man!  It has been a good long while since I have updated this blog!  Life just got so crazy busy for me.  I wasn't able to keep up!  The truth is, it is just as crazy now, if not more so, but I have this desire to blog again.  We'll see who is paying attention!

The new SU catalog is fantastic!  I have fallen in love with so many new stamp sets and products!  Where to begin!  I purchased the Mosaic Madness stamp set and embossing folder as well as the punch, first!  I think it will take a few tries to learn how to use it properly, to get the alignment and spacing right.  I am far to impatient to use a Stamp-A-Ma-Jig.  

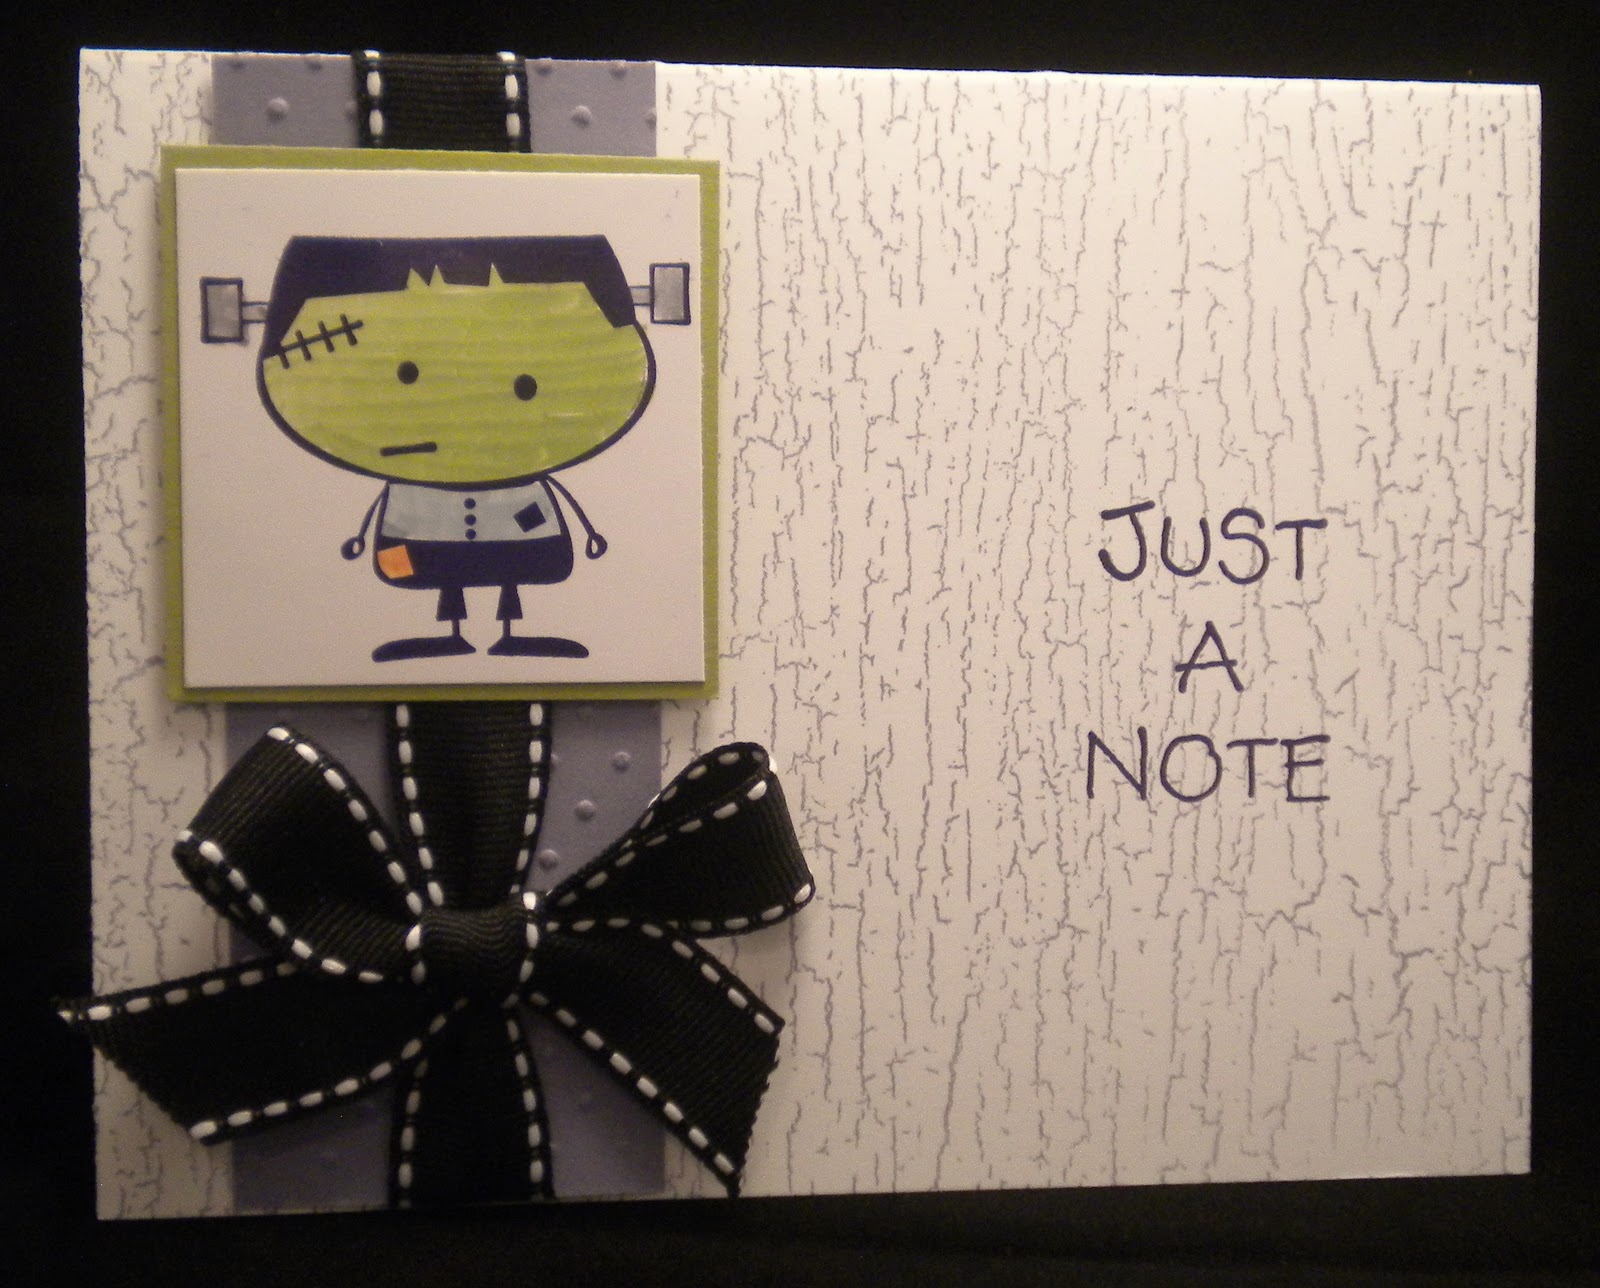
For this card I chose River Rock, black and white  CS.  I think I need to work on the lighting some, as it appears even more yellow than River Rock really is, but I like the simplicity of this card.  

Happy Monday, and remember......a hand made card is like a hug with a fold in the middle!

Blessings~
Shelli


November 28, 2011

Santa's Pants~~!

So, your son comes to you at 8 pm....."mom, tomorrow I need to bring a card or something for my Secret Santa teacher for student council.......can you make a card with Santa or something on it?"

So what is one to do but jump on SCS for inspiration, and I was NOT disappointed with all the ideas!  I got this little number from HERE!  I just made a few changes to the buckle and voila!  I used the directions from the blog I linked you to above and they were VERY easy to follow!

Needless to say my son was uber impressed and I think the teacher will like it too!

Mission accomplished.

November 21, 2011

100 years later.....

....she posts again.....sheesh!  Crazy-ness!

I know it's been a very long time since I posted.....such is life I guess!

I cased this from a blog just this morning, and now naturally someone has closed all my "windows" and I cannot seem to locate the author.  I will keep looking and add when I find you!

I started with Espresso CS, the DSP is Old Olive and the SS is Bitty Bouquets (ret.).  I simply used my SU markers to give it some life!

It's Mail-A-Card-Monday!  Get to it!  This one is going out today!

~~Blessings~~
       Shelli

November 04, 2011

List Pads~~

I have made these before, but have you?  They are cute and inexpensive to make!


First buy 5x7 steno pads.  Big stores like Costco sell them cheapest in yellow, and office supply stores sell them in the white like I found here.  White costs more but is easier to work with when it comes to colors.  Your office supply store will cut them in half for you for very little (around 1-2$ per stack) Call around in your area for the best prices on cutting.


The CS you use behind the pad will be 9.5 inches by 1/4 inch wider than your pad.  I have had the size of the pad vary after cutting based on how careful the person is, so measure the pad and add 1/4 inch.  The score on the longest part at 1inch and 1 1/4 inch for the piece that comes up and over the top.  You will use Sticky Tape to adhere the pad to the cs.  Place one piece on the top of the list pad and three on the back.  A trick I learned is to remove the film on the sticky tape piece on the front first, then adhere that before you remove the pieces on the back.  Sticky Tape is very unforgiving remember.  Then just decorate in whatever theme you like and place two strips of magnet on the back for hanging on the fridge!  Ta-Da!


If you're confused, come to club this month.  I just decided we will be making them!


~~Blessings~~
Shelli

October 31, 2011

Post It Pads~~

 Here's some more cuteness from the craft thingy I am doing this month!

These post it pads are made from the 4x4 coasters.  I covered them with DSP and my 3M gun.  Then I slightly sanded the edges,  used my Bind It All to link the two pieces and then decorated!

Inside is a standard sized post it pad, but I split them in two halves.  Meaning I separated one pad into two equal pads.  You need to cover all four sides of the coasters with DSP so that they are pretty when you open them too.  (which would have made a good photo......)

They are great little gifts for teachers and co-corkers a like!

Hugs!~~~


~~Blessings~~
        Shelli

October 30, 2011

Candle-O-Joy~~

I told you I was no good at post titles!

So as I mentioned I am doing a craft fair in my town.  It's a sweet friend of mine who has different vendors from home based companies and their own businesses come out to her HOUSE (brave girl) and sell our wares!  I am making a few handfuls of items to take over there in a couple weeks.

I like making these decorated candles.  They are easy and so cute!  I package them up in a clear cello-bag and tie it up with a cute little tag for gift giving.

I seem to remember these doing well.  Anyway, the DSP is from last year's SU Christmas collection.  The Snowman is from Very Merry and the other circle stamp is from Perfect Punches.  Be sure to use Sticky Strip tape (super strong) on the edges of the CS to hold it together!

~~Blessings~~
Shelli

October 29, 2011

You Bring Joy~~

Card #3 from the church event.  In keeping with the CAS theme, I used some DSP I had on hand from my LCS.  I chose the colors from there for the rest of the card.  They ended up being Bashful Blue, Certainly Celery and Peach Parfait.  The greeting is from my $1 bin dig a few weeks ago! The buttons are SU's Sizzix die that makes 4 cute little buttons.  I simply tied embroidery floss through them and added Dimensionals behind.  Ta-da!


Proof that encouragement doesn't have to be fancy!  Just mail that card, I dare ya!


~~Blessings~~
Shelli

October 28, 2011

Just a "note"~~

See what I did right there?  My son says that all the time when he does a play on words, goofy kid!


This is card number two from the event at church.  Very simple, but cute nonetheless.  The stamps you see inside the oval are two separate ones from the same set.  I simply placed them close enough so they would fit inside the punch.  Then I used Dimensionals to pop it up a little.    Add a tiny red rhinestone and you're all set!  Not much else to say about this one...........


~~Blessings~~
Shelli

October 27, 2011

Simple beauty~~

I hosted a card making event at church this past weekend.  I had the wonderful help of two good friends and it was fun!  


I wanted to share with the ladies about encouraging others. So often we get junk mail and bills, and nothing else in our mailboxes.  I bet your in box isn't much different.


My goal for this workshop was to spur the ladies who came to encourage others with the written word.  What a better way to do that than with a home-made card in the mail!  I got to share about two things I am passionate about; encouragement and card making!  A nice blend to say the least!


I was going for simple with the cards we made since I didn't think that most of the ladies who came would have card making experience, so what you will see is simplicity.


This DSP is left over from Sale-A-Bration several years back.  It is Sahara Sand.  I think its gorgeous paired with a little black don't you?  I used the new Sizzix frames for the oval shape, which is perfect ith the oval punch for the scripture you see!  I just love how SU pairs their products like the frames and the punches, for a big and easy WOW!  The little flower adds just the right pop with the rhinestone in the center.


I hope you are blessing someone today with a little love in the mail box!  Remember, a hand made card is a hug with a fold in the middle!


~~Blessings~~
Shelli


October 26, 2011

Choo-Choo!~~

My Grandson loves trains!  I mean like a lot!  It took one trip into his great grandpa's train room (to use the term room lightly) and he was hooked!  He is just 19 months and the boy is obsessed!  While this train stamp set is retired, and not very toddler-ish, he loved it anyway!  I started with Going Grey CS.  I used my note book edge punch on Real Red, and Grey ink for the train and greeting (that alphabet is also retired...sorry!).  I colored in the yellow in the windows with a marker for some interest and,  ta-da!

I kept the inside simple but fun!  Another retired SS called Letterpress (I will never get rid of either of those alphabets!) and a heart punch!

The finished size is 5.5 by 3.5.  Sometimes it's nice to have less space to fill.

I have started work on some items for a craft sale I am doing soon, come back to see photos of those!


~~Blessings~~
Shelli

October 20, 2011

More fall fun~~

This image is from the same set that I showed you yesterday.  I stamped this one on the white cs with Olive ink. Then I re-stamped it onto Pumpkin Pie cs, cut out the pumpkins and adhered them right over themselves on the white cs!


The greeting is also from the set.  I used Chocolate Chip ink directly on the DSP. I matted those two pieces onto Chocolate Chip cs.  The eyelets below it have been in my stash forever, as has the ribbon!  


I hope you're enjoying the fall cards!  Come back tomorrow for some items I am working on for a craft event I am doing next month!


~~Blessings~~
Shelli

October 19, 2011

Nothing says fall like....

Pumpkins of course!  I was at my LCS and this stamp set caught my eye.  It has some nice fall-ish images.  The pumpkin and leaves is one image.  


I simply colored the pumpkin and flowers in with my markers.  It''s a little challenging to see, but there are Old Olive SU brads in the flower enters.


I haven't done torn paper in a little while, and it seemed fitting here!  The fun ribbon is nothing special but it matches so nicely here.


As fall sets in with cooler temps, it becomes soup and stampin' weather!  Less time outside, more time in!  Soup in the crock pot leaves more time to stamp!


~~Blessings~~
Shelli


October 17, 2011

Film Frankie~~

I love this one!  Isn't it great!  (she says patting her own back).  I was talking to my daughter and she said "Mom, you don't send halloween cards...."  and I said "I'm not, he's from a movie, they are movie cards!" (sarcastically) and the idea was born to make a movie strip of Frankie!


I suppose I should have made the notches on the black cs on both sides, but I didn't really think of that until it was completed.  I used my markers in a continuous striping motion to get even color.  If you double back with markers, you get dark areas and uneven color.  The "hello" is also from the $1 bin.  I'm telling you, you need to stalk those craft store bins. I have a wonderful collection of words from the $1 bin, but I have been collecting them for a couple years.  Just grab a couple when you go.  They replenish every couple weeks!


Well, hats off to you.  Hug your kids, love your hubby, mail a card to a friend, and be thankful for what you have!  


~~Blessings~~
Shelli

October 16, 2011

Frankie~~~

When I saw this little guy lying in the bin at the store, I had the idea here.  I stamped him in blank ink onto Wasabi cs.  Then cut him out!  I ended up going over the black areas in his hair, pants and shoes with my marker to make it a crisper black.  I thought he needed a touch of color so I clipped a tiny piece of Pumpkin Pie cs and added it over the "patch" in his pants.  The scallop circle is Wisteria Wonder.  Finally I added those boogley eyes again!  They are available in so many sizes.  I recommend you get lots to have on hand.  I have added them to all kinds of things!  


One more for tomorrow, that happens to be my favorite, sort of.  They are all so cute!  See ya tomorrow!


~~Blessings~~
Shelli

October 15, 2011

Monster Mash~~

I could NOT resist this cute little guy at my LCS this week!  I don't really do halloween, but these lil' monsters remind me of that old Monster Mash song?  Do you know it?  He was $1!  So he came home with  me~~


I kept these very simple. Here I added some Wisteria Wonder ink to the base with an old retired stamp called Weathered.  I chose Lucky Limeade for Frankie.....!


And here I added some "boogley eyes" for additional interest!

Isn't he cute!!!!

I have two more to show you with Frankie!  Come back soon----


~~Blessings~~
Shelli