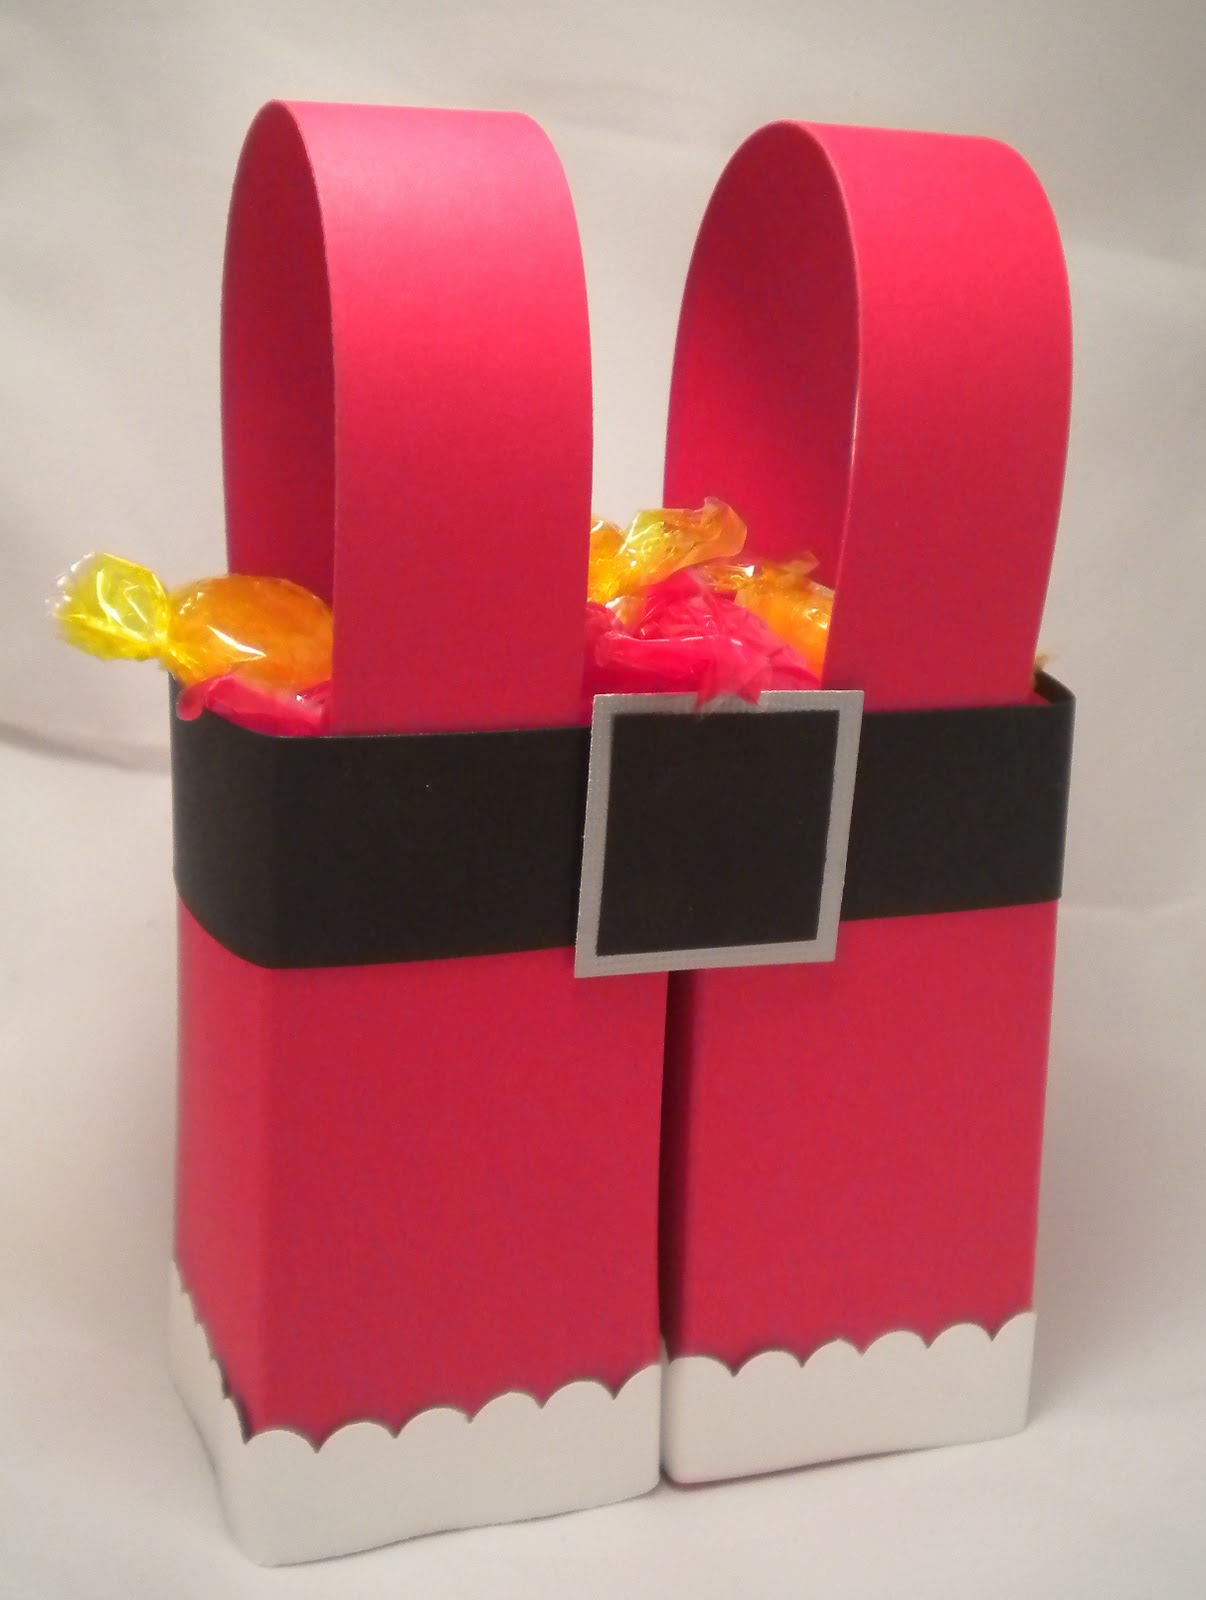
So, your son comes to you at 8 pm....."mom, tomorrow I need to bring a card or something for my Secret Santa teacher for student council.......can you make a card with Santa or something on it?"
So what is one to do but jump on SCS for inspiration, and I was NOT disappointed with all the ideas! I got this little number from HERE! I just made a few changes to the buckle and voila! I used the directions from the blog I linked you to above and they were VERY easy to follow!
Needless to say my son was uber impressed and I think the teacher will like it too!
Mission accomplished.
Showing posts with label Christmas. Show all posts
November 28, 2011
November 04, 2011
List Pads~~
I have made these before, but have you? They are cute and inexpensive to make!
First buy 5x7 steno pads. Big stores like Costco sell them cheapest in yellow, and office supply stores sell them in the white like I found here. White costs more but is easier to work with when it comes to colors. Your office supply store will cut them in half for you for very little (around 1-2$ per stack) Call around in your area for the best prices on cutting.
The CS you use behind the pad will be 9.5 inches by 1/4 inch wider than your pad. I have had the size of the pad vary after cutting based on how careful the person is, so measure the pad and add 1/4 inch. The score on the longest part at 1inch and 1 1/4 inch for the piece that comes up and over the top. You will use Sticky Tape to adhere the pad to the cs. Place one piece on the top of the list pad and three on the back. A trick I learned is to remove the film on the sticky tape piece on the front first, then adhere that before you remove the pieces on the back. Sticky Tape is very unforgiving remember. Then just decorate in whatever theme you like and place two strips of magnet on the back for hanging on the fridge! Ta-Da!
If you're confused, come to club this month. I just decided we will be making them!
First buy 5x7 steno pads. Big stores like Costco sell them cheapest in yellow, and office supply stores sell them in the white like I found here. White costs more but is easier to work with when it comes to colors. Your office supply store will cut them in half for you for very little (around 1-2$ per stack) Call around in your area for the best prices on cutting.
The CS you use behind the pad will be 9.5 inches by 1/4 inch wider than your pad. I have had the size of the pad vary after cutting based on how careful the person is, so measure the pad and add 1/4 inch. The score on the longest part at 1inch and 1 1/4 inch for the piece that comes up and over the top. You will use Sticky Tape to adhere the pad to the cs. Place one piece on the top of the list pad and three on the back. A trick I learned is to remove the film on the sticky tape piece on the front first, then adhere that before you remove the pieces on the back. Sticky Tape is very unforgiving remember. Then just decorate in whatever theme you like and place two strips of magnet on the back for hanging on the fridge! Ta-Da!
If you're confused, come to club this month. I just decided we will be making them!
~~Blessings~~
Shelli
October 31, 2011
Post It Pads~~
Here's some more cuteness from the craft thingy I am doing this month!
These post it pads are made from the 4x4 coasters. I covered them with DSP and my 3M gun. Then I slightly sanded the edges, used my Bind It All to link the two pieces and then decorated!
Inside is a standard sized post it pad, but I split them in two halves. Meaning I separated one pad into two equal pads. You need to cover all four sides of the coasters with DSP so that they are pretty when you open them too. (which would have made a good photo......)
They are great little gifts for teachers and co-corkers a like!
Hugs!~~~
~~Blessings~~
Shelli
These post it pads are made from the 4x4 coasters. I covered them with DSP and my 3M gun. Then I slightly sanded the edges, used my Bind It All to link the two pieces and then decorated!
Inside is a standard sized post it pad, but I split them in two halves. Meaning I separated one pad into two equal pads. You need to cover all four sides of the coasters with DSP so that they are pretty when you open them too. (which would have made a good photo......)
They are great little gifts for teachers and co-corkers a like!
Hugs!~~~
~~Blessings~~
Shelli
October 30, 2011
Candle-O-Joy~~
I told you I was no good at post titles!
So as I mentioned I am doing a craft fair in my town. It's a sweet friend of mine who has different vendors from home based companies and their own businesses come out to her HOUSE (brave girl) and sell our wares! I am making a few handfuls of items to take over there in a couple weeks.
I like making these decorated candles. They are easy and so cute! I package them up in a clear cello-bag and tie it up with a cute little tag for gift giving.
I seem to remember these doing well. Anyway, the DSP is from last year's SU Christmas collection. The Snowman is from Very Merry and the other circle stamp is from Perfect Punches. Be sure to use Sticky Strip tape (super strong) on the edges of the CS to hold it together!
So as I mentioned I am doing a craft fair in my town. It's a sweet friend of mine who has different vendors from home based companies and their own businesses come out to her HOUSE (brave girl) and sell our wares! I am making a few handfuls of items to take over there in a couple weeks.
I like making these decorated candles. They are easy and so cute! I package them up in a clear cello-bag and tie it up with a cute little tag for gift giving.
I seem to remember these doing well. Anyway, the DSP is from last year's SU Christmas collection. The Snowman is from Very Merry and the other circle stamp is from Perfect Punches. Be sure to use Sticky Strip tape (super strong) on the edges of the CS to hold it together!
~~Blessings~~
Shelli
December 13, 2010
~~Let it Snow!
I also used the SU snowflake punch here and the SS is called Big On Christmas. A small touch of colored pencils and ta-da! You could also color in the letters for another "pop"~!
I hope your Christmas shopping and plans are coming along. Take time to pause and remember the purpose of Christmas. Celebrate the Savior!
~~Stamping Smiles~~
Shelli
December 16, 2009
Candle Eye Candy~~
My shopping is mostly done, but not the wrapping! How about you? Where are you at? Drop me a comment and let me know!
~~Stamping Smiles~~
Shelli
November 20, 2009
Fun Frames~~
Same recipe as yesterday except I used Certainly Celery CS and ribbon and matted the image with Celery and Garden Green CS. Sadly, I do not have pictures of the other frames as I got to crunch time for the boutiques and ran out of time to photograph them!
If you are local, I have one spot still available in my Project Parade class. I limit this class to ten guests. It will take place Thanksgiving weekend on Saturday morning. The Parade will be a total of ten gift tags and 15 other projects for just $27! Shocking right? I know! This is my second annual Projects Parade and it will be a super fun day of chatting and crafting. The types of gifts we make will be the small things you need to have for co-workers, teachers and neighbors or stocking stuffer's!
Here is a list: (sorry, photos will not be available until after the Parade)
1 covered steno list pad (examples in a previous blog post)
3 3x3 gift cards with envelopes
2 candy bags with decorative topper
2 tile coasters
1 3x5 acrylic post it note frame
2 pillow boxes with candy
2 magnet post it holders
2 magnet calendars
10 tags
Whew! The class will go from 9:30 AM to 2 PM. Bring a sack lunch and we will break for at least 30 seconds to allow you to eat! RSVP is a must, so contact me today to reserve the last spot! (email here on my blog)
I have a busy weekend in Phoenix. My daughter is a dancer and has her first dance competition in Mesa on Saturday night. I am driving there this afternoon to spend time with some great friends (Hi JoAnn, Steph and Tenisha!) and then tomorrow to the competition, then down to Tuscon for a wedding, then back to Phoenix for more dance, then...............I am tired already! You will not see me here again until at least Monday!
~~Stamping Smiles~~
Shelli
November 19, 2009
Snow~~
More boutique stuff for you today. I made these little guys and I must say I fell in love! I used the exact same design for a card too! Tomorrow I will show you another one.
I brought out my SU Elegant Bouquet embossing folder for the subtle background texture. It needed "something" and I found the partial embossing here to be just right! The image is from the set called Big on Christmas. I adore this set! Tomorrow you will see another image from the set, and there is yet a third! (Page 40 in the current catalog) The snowflakes were done with the new SU Snowflake punch and I added a little bling from my LSS. I stamped the image in Brilliant Blue ink, colored just a tiny with my SU markers (you need to save up for these!) and double matted with Bashful Blue and Brilliant Blue CS. Easy peasy! Oh, the ribbon is also SU striped ribbon, love that stuff!
It is easy to add "pop" to your stamping with just some small finishing touches, like bling. The tiny rhinestones come in a bag of like 200 for just a few dollars, or use a coupon, even better! Or add some paper piercing, or even a little dry embossing with your Big Shot or Cuttlebug.....it changes everything. If you want to dress up your projects, think details first. Small things really can add a big effect.
Now get to stamping and mail a hug!
~~Stamping Smiles~~
Shelli
November 16, 2009
Snow Man Soup~~
I am happy to report that both Boutiques I was involved with this weekend were smashing successes! Thank you Lord!
Was told you’ve been real good this year
Always glad to hear it
With freezing weather drawing near
You’ll need to warm the spirit
So here’s a little snowman soup
Complete with stirring stick
Just add hot water and sip it slow
It’s sure to do the trick!
Cute huh?!! I printed the poem out on small slips of paper and dropped them inside the bag with the other ingredients! Add a nice mug and you have a wonderful co-worker or teacher or neighbor gift!
Have a great day and get to stampin' those Christmas cards will ya~~~
~~Stamping Smiles~~
Shelli
November 09, 2009
Christmas Frame #2~~
On a personal note, in case I didn't tell everyone already, my Gran-Baby-Belly is a BOY! Just found out! Yay God! Honestly, you know I didn't care either way, but it is fun knowing for certain! Apparently he is not shy with his "parts" so the tech was certain! Now to begin the making of cute boy stuff!
~~Stamping Smiles~~
Shelli
November 08, 2009
Designer Frame~~
The frames I got at good ole Wally World for $3. The window on the frame is 5x12, and that's how big I cut the DSP in the back to start. The alphabet is Letter Press (ret.) again. The tiny alphabet (used to stamp merry) is an SU set so old, I don't even have sticker anymore. I used the new SU snowflake punch, the Ticket Corner punch and some bling. I had fun making this one! You can see I triple matted my letters. To do this, I measure my first layer of CS 1 1/4 by 2 1/4. The other layers increase 1/4 inch each time. Sometimes I double mat the letters, but for these I liked the triple matting better. The DSP in the back is from my LSS.
Any larger alphabet will do----and if you are a club member of mine and would like to borrow my stamp set, I will loan it to ya for a week so you can make some too!
Come back tomorrow for one more similar to this!
Boutique update: I am feverishly creating and Cookie let me know that some of the helpers who come to prepare the boutique have already purchased some of my items, so I am selling before the boutique opens! Hooray! I have a few more days to craft away, so off I go!
A wonderful sweet friend of mine recently gave me this quote......." A handmade card is a hug with a fold in the middle!" Don't you love it? Thanks Kathie! Now get out there and mail someone a hug!
~~Stamping Smiles~~
Shelli
November 05, 2009
Joy Joy Joy~~~
itToday's frame was made for the boutique, but I like it so much, I plan to make some for gifts as well as one for me! I used DSP from the current level 1 hostess paper pack by SU! My alphabet is Letterpress (ret.) The small Merry Christmas is from Teeny Tiny Wishes and I used the coordinating designer label punch. I used Bashful Blue CS and some Silver Stretchy Cord, also by SU! The snowflake punch is a Martha Stewart.
Tomorrow you will likely see another frame, but it will be bigger and much different! Stay tuned!
Tonight was the first run in our newly remodeled snack bar here at camp, the Hungry Bear Market. It is so nice in there! There are still bugs to be worked out, but it is a beautiful place now! Stop by and see me sometime~~~~
~~Stamping Smiles~~
Shelli
November 04, 2009
Treat Box~~
I was inspired to decorate mine like this by a blog earlier last week, but I cannot find that entry now! ( I look at about 25 blogs a day so my inbox fills up FAST!) So if it is yours, let me know. I want to give proper credit!
These are super simple and inexpensive to put together for student gifts, friend gifts or when you see your nail tech or someone like that! Naturally they can be made anytime of year with out the Christmas theme, and filled with any yummy candy you want! These could be adapted for all holiday's! I am taking a boat-load of these to the Brinkmeyer Boutique in a couple weeks. They will be priced to sell, and sell they will! ( I hope.....)
Go make one, you will see how easy it is!
~~Stamping Smiles~~
October 06, 2009
New Toys~~
I started with Kraft CS and added some Merry Moments DSP that I punched with my Scallop Edge punch by SU. I then tied some Old Olive gross grain ribbon around the card. I drew the lines, representing the strings for the ornaments, with my Bravo Burgundy and Old Olive markers. Next I stamped the two ornaments with matching ink onto Very Vanilla CS, punched with the Ornament punch (smile*) and adhered with Dimensionals. I stamped the Merry Christmas greeting, from Teeny Tiny Wishes, directly onto the card front with Bravo Burgundy ink, and tied some button twine around the ornament tops.....voila!
I think it is so cool how SU makes stamps and punches that go together! I am spolied now, and I wish they had a punch for almost every shape! They are getting close! There are even Rub On's that match this punch!
If you want to get a jump on your Christmas cards, here is a way to do it fast and easy, but with a big effect! Imagine the color options, you wouldn't even have to make them all the same! Variety is the spice of life right?
I am almost done with my samples for the Tag Class, so look for those soon! I also have two Holiday Boutiques coming up in November, so if you are local, you can look for information about those as well. They are both the weekend of November 13th. You may not be interested in buying MY stuff, since most of you can make it yourself, but it would great for you to support the Citizens Cemetary and see all the wonderful hand crafted items that maybe you DON'T know how to make, and get some Chrismas shopping done!
~~Stamping Smiles~~
Shelli
Subscribe to:
Posts (Atom)