November 20, 2009

Fun Frames~~

Fun Frame #2! There were a couple others, but they sold at the boutiques (yay!) Interestingly enough, these two were my personal favorites, and the others I was not quite as fond of. Yet theses were left! It just goes to show you....well I don't know what it goes to show you really.......

Same recipe as yesterday except I used Certainly Celery CS and ribbon and matted the image with Celery and Garden Green CS. Sadly, I do not have pictures of the other frames as I got to crunch time for the boutiques and ran out of time to photograph them!

If you are local, I have one spot still available in my Project Parade class. I limit this class to ten guests. It will take place Thanksgiving weekend on Saturday morning. The Parade will be a total of ten gift tags and 15 other projects for just $27! Shocking right? I know! This is my second annual Projects Parade and it will be a super fun day of chatting and crafting. The types of gifts we make will be the small things you need to have for co-workers, teachers and neighbors or stocking stuffer's!
Here is a list: (sorry, photos will not be available until after the Parade)
1 covered steno list pad (examples in a previous blog post)
3 3x3 gift cards with envelopes
2 candy bags with decorative topper
2 tile coasters
1 3x5 acrylic post it note frame
2 pillow boxes with candy
2 magnet post it holders
2 magnet calendars
10 tags

Whew! The class will go from 9:30 AM to 2 PM. Bring a sack lunch and we will break for at least 30 seconds to allow you to eat! RSVP is a must, so contact me today to reserve the last spot! (email here on my blog)

I have a busy weekend in Phoenix. My daughter is a dancer and has her first dance competition in Mesa on Saturday night. I am driving there this afternoon to spend time with some great friends (Hi JoAnn, Steph and Tenisha!) and then tomorrow to the competition, then down to Tuscon for a wedding, then back to Phoenix for more dance, then...............I am tired already! You will not see me here again until at least Monday!

~~Stamping Smiles~~
Shelli

November 19, 2009

Snow~~

Okay, so there isn't any snow yet (thank goodness!) but it is on it's way for sure! But that's what the image says.....S N O W !!

More boutique stuff for you today. I made these little guys and I must say I fell in love! I used the exact same design for a card too! Tomorrow I will show you another one.

I brought out my SU Elegant Bouquet embossing folder for the subtle background texture. It needed "something" and I found the partial embossing here to be just right! The image is from the set called Big on Christmas. I adore this set! Tomorrow you will see another image from the set, and there is yet a third! (Page 40 in the current catalog) The snowflakes were done with the new SU Snowflake punch and I added a little bling from my LSS. I stamped the image in Brilliant Blue ink, colored just a tiny with my SU markers (you need to save up for these!) and double matted with Bashful Blue and Brilliant Blue CS. Easy peasy! Oh, the ribbon is also SU striped ribbon, love that stuff!

It is easy to add "pop" to your stamping with just some small finishing touches, like bling. The tiny rhinestones come in a bag of like 200 for just a few dollars, or use a coupon, even better! Or add some paper piercing, or even a little dry embossing with your Big Shot or Cuttlebug.....it changes everything. If you want to dress up your projects, think details first. Small things really can add a big effect.

Now get to stamping and mail a hug!


~~Stamping Smiles~~
Shelli

November 16, 2009

Snow Man Soup~~


I am happy to report that both Boutiques I was involved with this weekend were smashing successes! Thank you Lord!
This little guy was a huge success! made over 30 of them and they all went! I got treat bags from my LSS and cut down a bit (as they were longer than I wanted), added cocoa, marshmallows (in a small jewelry bag to keep them fresh), a Kiss, and a peppermint stick. I made the bag topper with SU's Top Note Die, a MUST have! Together with a cute little poem, they are called Snow Man Soup!

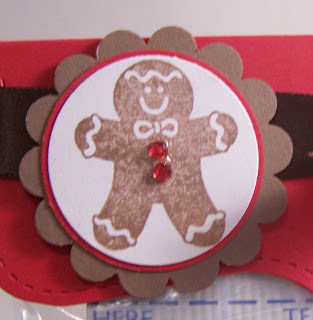
This little ginger bread man is ancient SU! I added red rhinestones to dress him up a bit, and ta-da! Curious about the poem? I did not make it up, and at this point I am not sure anyone truly knows who did, but it goes like this:

Was told you’ve been real good this year
Always glad to hear it
With freezing weather drawing near
You’ll need to warm the spirit
So here’s a little snowman soup
Complete with stirring stick
Just add hot water and sip it slow
It’s sure to do the trick!
Cute huh?!! I printed the poem out on small slips of paper and dropped them inside the bag with the other ingredients! Add a nice mug and you have a wonderful co-worker or teacher or neighbor gift!
Have a great day and get to stampin' those Christmas cards will ya~~~
~~Stamping Smiles~~
Shelli

November 09, 2009

Christmas Frame #2~~

I almost like this one better than the last! I have a lot of these colors in my home, so if I make one for me, this will be the one! Same deets as the last post.............

On a personal note, in case I didn't tell everyone already, my Gran-Baby-Belly is a BOY! Just found out! Yay God! Honestly, you know I didn't care either way, but it is fun knowing for certain! Apparently he is not shy with his "parts" so the tech was certain! Now to begin the making of cute boy stuff!

~~Stamping Smiles~~
Shelli

November 08, 2009

Designer Frame~~

I have made a ton of name frames in the past, but have wanted to make on for Christmas for quite some time. Do you do that? Get this idea, but your so busy doing other things, that you never get to it? Well, I do! Anyway, I am really pleased with the way these turned out. I have another one to show you tomorrow too!

The frames I got at good ole Wally World for $3. The window on the frame is 5x12, and that's how big I cut the DSP in the back to start. The alphabet is Letter Press (ret.) again. The tiny alphabet (used to stamp merry) is an SU set so old, I don't even have sticker anymore. I used the new SU snowflake punch, the Ticket Corner punch and some bling. I had fun making this one! You can see I triple matted my letters. To do this, I measure my first layer of CS 1 1/4 by 2 1/4. The other layers increase 1/4 inch each time. Sometimes I double mat the letters, but for these I liked the triple matting better. The DSP in the back is from my LSS.

Any larger alphabet will do----and if you are a club member of mine and would like to borrow my stamp set, I will loan it to ya for a week so you can make some too!

Come back tomorrow for one more similar to this!

Boutique update: I am feverishly creating and Cookie let me know that some of the helpers who come to prepare the boutique have already purchased some of my items, so I am selling before the boutique opens! Hooray! I have a few more days to craft away, so off I go!

A wonderful sweet friend of mine recently gave me this quote......." A handmade card is a hug with a fold in the middle!" Don't you love it? Thanks Kathie! Now get out there and mail someone a hug!

~~Stamping Smiles~~
Shelli

November 05, 2009

Joy Joy Joy~~~

I am still crafting away to prepare for the Brinkmeyer Boutique! If you are local and would love to Holiday shop AND get a peek inside a of a beautiful historic homes here in Prescott, then you will want to go to the boutique! Profit from this event goes to the Citizens Cemetery here in town to help with up keep and fix issues caused by vandals and what not. I dropped off some of my items today and got to meet Cookie Brinkmeyer. What a great lady! She is a fun loving gal, I can tell! I think she would be a hoot at parties! She has most of the boutique set up already and it is adorable in there! All items are hand crafted and so great! You will be sure to find something for several people on your shopping list! The boutique is November 13-15 from 9-5 Friday and Saturday and 10-2 on Sunday. The home is on the corner of Park and Gurley in town. Don't miss it!

itToday's frame was made for the boutique, but I like it so much, I plan to make some for gifts as well as one for me! I used DSP from the current level 1 hostess paper pack by SU! My alphabet is Letterpress (ret.) The small Merry Christmas is from Teeny Tiny Wishes and I used the coordinating designer label punch. I used Bashful Blue CS and some Silver Stretchy Cord, also by SU! The snowflake punch is a Martha Stewart.


Here is a close up of the greeting and snowflake. This was so easy to do! I added some rhinestones from my LSS for the Bling-Factor and, ta-da! The next ones I am planning will be a variety of colors. The JOY fits nicely in this 4x6 frame.

Tomorrow you will likely see another frame, but it will be bigger and much different! Stay tuned!

Tonight was the first run in our newly remodeled snack bar here at camp, the Hungry Bear Market. It is so nice in there! There are still bugs to be worked out, but it is a beautiful place now! Stop by and see me sometime~~~~

~~Stamping Smiles~~
Shelli

November 04, 2009

Treat Box~~

Some time this spring, I saw a cute treat box like this that was made with a Sixxiz die. I wanted to make one, but in a constant effort to save money (or spend it elsewhere....) I came up with my own version! I was pretty pleased with the result HERE. At that time I wanted to put a window in so the candy was visible but I didn't have the tools to make it happen. Well, now I have some Nestabilities dies and so I used them on this project to make the window!
To make your own, cut a piece of CS to 3 1/2 by 11 inches. Score at 4 1/2, 5 1/2 and 10 inches. The strip of CS is 3 1/2 by 3/4 inches. Use any shape Nestabilities you like for the window. The baggie for the candy is 3x4 and was purchased at my LSS in the jewelry section. They zip closed, and are the perfect size for this particular project! Simply staple the bag in, use a tiny bit of adhesive on the flap to keep it closed, and add ribbon and a tag for the cute-ness factor! Voila!

I was inspired to decorate mine like this by a blog earlier last week, but I cannot find that entry now! ( I look at about 25 blogs a day so my inbox fills up FAST!) So if it is yours, let me know. I want to give proper credit!

These are super simple and inexpensive to put together for student gifts, friend gifts or when you see your nail tech or someone like that! Naturally they can be made anytime of year with out the Christmas theme, and filled with any yummy candy you want! These could be adapted for all holiday's! I am taking a boat-load of these to the Brinkmeyer Boutique in a couple weeks. They will be priced to sell, and sell they will! ( I hope.....)

Go make one, you will see how easy it is!

~~Stamping Smiles~~
Shelli

November 01, 2009

RAK~~

This card was made FOR me by my daughters sweet BFF, Vicky! Also know an Vick Chick, and Wicky! Hi Vicky! Isn't she so crafty!

I am blessed to have a wonderful daughter who is, well, wonderful! She also enjoys crafting with me. She is seventeen and on her way to wonderful adulthood! She and her BFF are so great together! She couldn't have picked a better girl for a friend. Both are seniors and ready to take on the world next fall!

Thanks for the card Vick Chick! Long live Wicky and Dim!

~~Stamping Smiles~~
Shelli